Easy Flour Tortillas
Spice up your next Mexican-inspired feast with these memorable homemade flour tortillas. They have a soft texture but remain sturdy enough to hold all your preferred fillings—from tacos and burritos to hot fajitas and cheesy enchiladas. Even though they have a restaurant-quality feel, you’ll find them easy to make. With just five basic ingredients and a quick mix by hand or in your stand mixer, you’ll soon have warm pliable tortillas ready to wrap any meal in pure comfort.
As we’ve dug deeper into the realm of homemade cooking, we knew we’d give flour tortillas from scratch a shot. And you know what? Every second spent rolling and flipping them on the hot skillet has an impact on the final product. The smell, the feel, the pride — nothing beats the genuine article made with your own two hands.
There’s a ton of flour tortilla recipes floating around, so it’s not breaking news. I’m not going to claim that my recipe is “authentic” or tied to some long-standing tradition. Coming from Slovak and German heritage and now living in Belgium, I’m as far from a genuine Mexican kitchen as it gets. 😉
What I can guarantee is that these tortillas taste amazing. They’re soft, full of flavor, and balanced. One bite, and you’ll see what I mean.
Making Flour Tortillas from Scratch
This recipe comes together , which makes it such a great choice. You can use a stand mixer, a hand mixer, or just mix by hand based on what you have in your kitchen. The process doesn’t change—combine the flour baking powder, and salt first. Then, mix in the oil until it forms a crumbly texture. Add warm water next and knead the mixture until the dough feels soft and stretchy.
Next, break off pieces of dough to form tortillas. You can make about sixteen small, taco-sized ones from this recipe. If exact measurements matter to you, go ahead and measure, but I like doing it the easy way. Split the dough in half, split each half again, and keep going until you have sixteen pieces. They might not all be the same size, but , nobody at my table ever notices — or cares for that matter.
Roll each piece into a neat little ball, press it flat with your hand, and let the discs sit for a bit. After that, roll them thin into round shapes. There you go — fresh tortillas ready to toss onto a hot skillet.
The final step is cooking the tortillas. A hot skillet does the job in just a minute or two. Both cast-iron and nonstick pans work great. When you see small air bubbles forming on top and golden-brown spots appear underneath, you’re doing it right. That’s the moment to flip it, enjoy the process, and move on to the next tortilla.
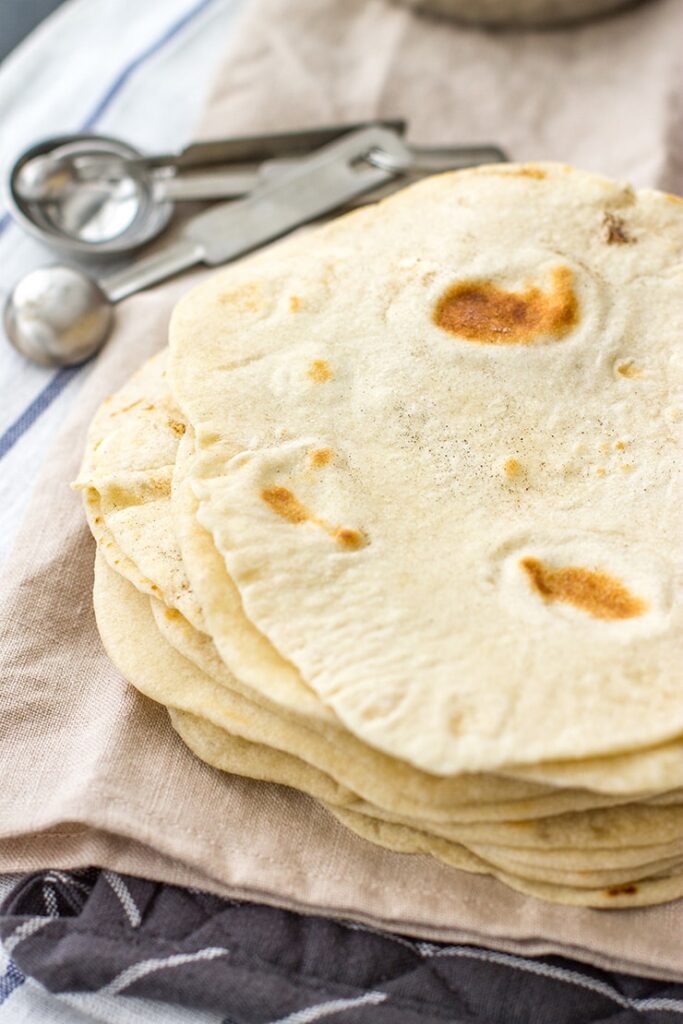
You need to cook them . Each tortilla requires about 60 to 120 seconds in a hot pan – cast iron or nonstick, whichever you have available. You’ll know they’re cooking when small bubbles form across the surface and the bottom turns a light golden brown.
I’m fortunate to have my husband as the designated tortilla flipper at home. He claims it’s soothing – a kind of kitchen mindfulness. And to be honest, he might be right since the person flipping always gets to taste the first warm sample right out of the pan.
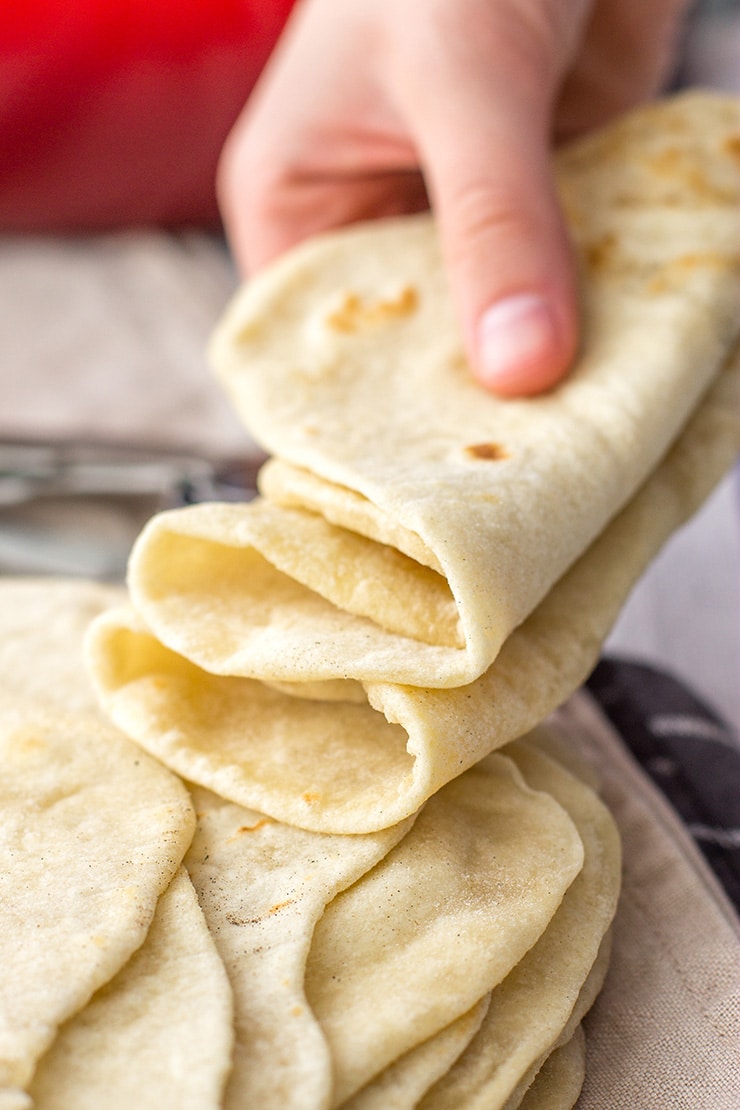
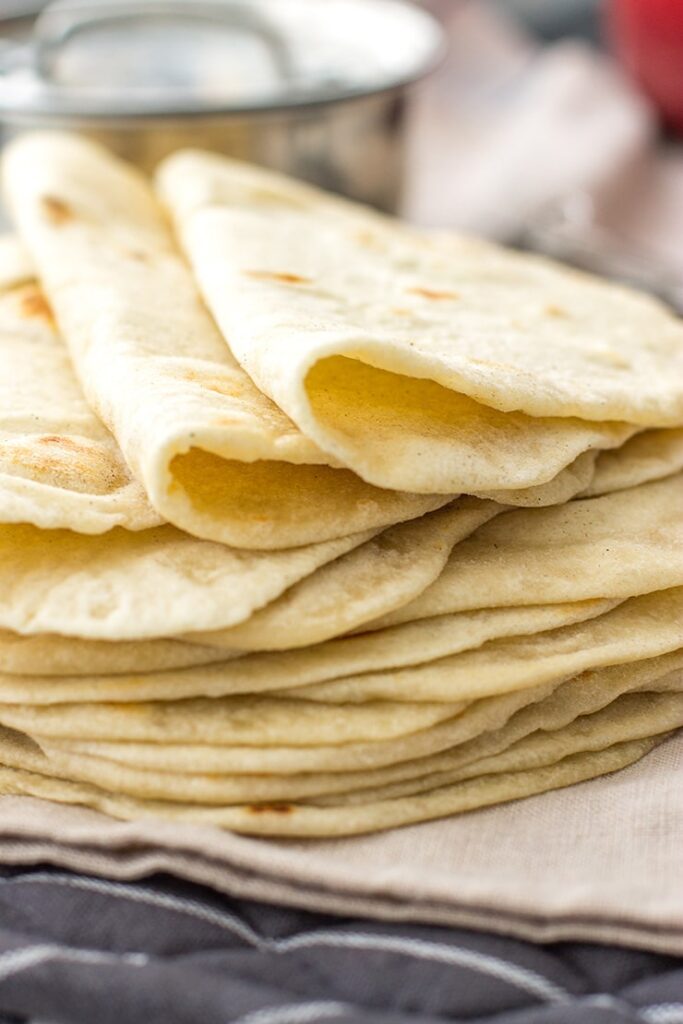
These tortillas strike a perfect balance: they’re soft and bendable, but tough enough to hold any filling you can think of. But if you skip the fillings and just rip into one straight from the griddle, we won’t judge.
Try this recipe out — I bet you’ll love how they come out, and feel a bit prouder knowing you made them from scratch. Savor every warm buttery mouthful! ♥
Easy Flour Tortillas from Scratch
Prep Time: 30 minutes Cook Time: 30 minutes Total Time: 1 hour 15 minutes Yield: 16 tortillas
Bring a homemade touch to your next Mexican-inspired meal with these soft, flavorful flour tortillas. They’re the perfect foundation for tacos, burritos, enchiladas, or anything else that calls for a warm, flexible wrap. Light, tender, and strong enough to hold any filling, these tortillas are as reliable as they are delicious. Best of all, they come together easily with just five simple ingredients—no fancy tools required.
Equipment You’ll Need
- Mixing Bowl – For combining and kneading your dough.
- Pastry Mat or Clean Countertop – A smooth surface for rolling out the tortillas.
- Cast-Iron Skillet or Heavy Pan – Ideal for achieving those beautiful golden spots and a soft, chewy texture.
- Clean Kitchen Towels – To cover the cooked tortillas and keep them warm and tender.
Ingredients
- 3 cups all-purpose flour – plus a little extra for dusting
- 1 teaspoon salt – to balance and enhance flavor
- 1 teaspoon baking powder – for lightness and flexibility
- ⅓ cup vegetable oil, shortening, or lard – your choice of fat for tenderness
- 1 cup hot water – to bring everything together into a smooth, soft dough
Stand Mixer Instructions
- Combine Dry Ingredients
In the bowl of your stand mixer fitted with a dough hook, add the flour, salt, and baking powder. Mix briefly on low speed just to blend everything evenly. - Add Wet Ingredients
With the mixer running on medium speed, slowly pour in the oil and hot water. Let it mix for about 1–2 minutes, pausing once to scrape down the sides so nothing gets left behind. - Knead the Dough
Once the dough starts to come together into a soft ball, lower the speed to low and continue mixing for another 1–2 minutes. The dough should feel smooth, elastic, and easy to handle — that’s when you know it’s ready.
Mix by Hand Instructions
- Combine the Dry Ingredients
In a large mixing bowl, whisk together the flour, salt, and baking powder until evenly blended. - Work in the Fat
Add the vegetable oil (or your chosen fat) and stir with a fork or your fingers until the mixture looks crumbly, like coarse sand. - Bring It Together
Pour in the warm water and mix until the dough starts to come together. Lightly flour your hands, then knead just until a rough, shaggy dough forms — it doesn’t need to be perfectly smooth yet.
Next Steps: Rolling and Preparing to Cook
No matter how you mixed your dough—by hand or with a stand mixer—transfer it now onto a well-floured surface. Divide the dough into 16 fairly equal portions. Roll each piece into a small ball, then gently press it flat with your palm. Cover the pieces with a clean kitchen towel and let them rest for at least 15 minutes, or up to an hour if you’ve got the time. This resting step helps relax the gluten, making the dough easier to roll out later.
When you’re ready to cook, heat a large cast-iron or heavy-bottomed skillet over medium-high heat. Keep both your work surface and rolling pin lightly floured, then roll each dough ball into a thin circle—about 6 inches wide.
Tip: Try not to stack the rolled-out tortillas, as they’ll stick together. If you need extra space, place them between sheets of lightly floured parchment paper until it’s time to cook.
Cooking the Tortillas
Place one tortilla at a time into the hot skillet. Let it cook for about 1 minute, or until small bubbles appear on the surface and golden-brown spots begin to form underneath.
If it’s taking longer than a minute for color to appear, turn the heat up slightly. If it’s browning too fast, lower the heat a touch — you want those soft golden patches, not dark crisp ones.
Flip the tortilla and cook the second side for roughly 30 seconds. It should puff lightly in spots and stay flexible.
As each one finishes, transfer it to a clean kitchen towel and wrap it loosely to keep warm. Stack the tortillas as you go — the gentle steam will keep them soft and perfectly pliable until serving time.
Serving and Storage
Serve the tortillas right away while they’re warm and soft, or let them cool for later use.
For short-term storage, keep them in a plastic zip-top bag in the refrigerator for 2–3 days. When you’re ready to enjoy them again, wrap a few in a slightly damp paper towel and warm in the microwave for 15–30 seconds — they’ll turn soft and flexible again.
For longer storage, tortillas freeze beautifully. Separate each one with parchment or wax paper, stack them, and place in a freezer-safe zip-top bag. They’ll keep well for up to 2–3 months. To reheat, thaw briefly at room temperature, then warm in a dry skillet or the microwave.
Notes
Adapted from recipes originally shared on Cooks.com, with inspiration from A Dash of Sanity and The Café Sucre Farine.
Nutrition Estimate
Author: Monica
Course: Main
Cuisine: American, Mexican, Tex-Mex